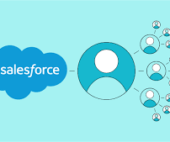
Install Mailchimp for Salesforce in your Salesforce account to seamlessly synchronize data with Mailchimp. By establishing this integration, you gain the ability to efficiently transfer your sales leads and contacts to Mailchimp, enabling targeted outreach through personalized email content delivery.
This guide outlines the process of connecting Mailchimp for Salesforce and configuring the application to synchronize information with your Mailchimp account. Here are key points to consider before initiating the connection:
Mailchimp for Salesforce is compatible with Salesforce Enterprise, Unlimited, Force.com, Developer, Performance, or Professional editions. If using Professional edition, ensure API access is enabled by consulting your Salesforce Account Executive before installing Mailchimp for Salesforce.
Salesforce users must have the appropriate permission set for Mailchimp, and the associated Mailchimp user in your Salesforce account should possess Manager access or higher to establish and maintain the connection.
Only Regular Email and RSS campaigns are visible in Mailchimp for Salesforce.
A Trailblazer.me account is required to access this integration.
To install Mailchimp for Salesforce, follow these steps:
Visit the Salesforce integration’s AppExchange listing.
Click “Get it Now.”
In the Let’s Get Started modal, log in with your Trailblazer.me account.
Choose your preferred login method, enter credentials, and click “Log In.”
Click “Install in Production.”
On the Confirm Installation Details page, confirm agreement to terms and conditions, and click “Confirm and Install.”
Choose “Install for All Users” and click “Install.”
In the Approve Third-Party Access pop-up modal, confirm granting access to third-party websites and click “Continue.”
Upon completion, Salesforce will notify you by email, and you’ll proceed to the Install Wizard to authenticate your Mailchimp account.
Note:
The integration supports connection with a single Mailchimp account.
The Mailchimp account linked to the integration must have Manager access or higher to maintain the connection.
Additionally:
Salesforce Sandbox does not fully support all features.
Disconnect and reconnect are required for user changes.
Installation in production is recommended for optimal functionality.
Step 1: Authenticate
Before creating leads or syncing data, connect your Mailchimp account:
Log into Salesforce.
From the App Launcher, choose “Mailchimp for Salesforce.”
Click the MC Setup tab.
Click “Login.”
In the pop-up, click “OK.”
Enter Mailchimp credentials and click “Log In.”
If managing multiple Mailchimp accounts, select the desired account.
Step 2: Lead Creation
Enable Mailchimp to create Salesforce leads from Mailchimp contacts:
Check “Allow Mailchimp to create Leads in Salesforce.”
Click “I am Ready to Map Fields.”
Step 3: Map Fields
Specify Salesforce data fields to map to Mailchimp audience fields:
Match Salesforce Lead and Contact Fields to Mailchimp Fields.
Click “Save.”
Add new fields if necessary:
Click the Field Type drop-down to choose a type.
Input a field name.
Check “Field required” if needed.
Click “Add field” and then “Save.”
Exit the Install Wizard and proceed to the MC Setup page to configure sync settings and enable data sync between Salesforce and Mailchimp.
Enable Permission Sets
Assign appropriate permission sets for Mailchimp for Salesforce:
Log in to Salesforce.
Under Administer, click “Manage Users” and then “Users.”
Edit the user.
Click “Permission Set Assignments” and “Edit Assignments.”
Add “Mailchimp User” and “Mailchimp Admin” to enabled permission sets.
Click “Save.”
Choose Sync Settings
Manage the space occupied by Mailchimp data in Salesforce:
Navigate to the MC Setup page.
On the Audience tab, choose sync settings for each connected audience.
Click “Save.”
Turn On Data Sync and Lead Creation
Activate data sync to ensure regular communication between Mailchimp and Salesforce:
Go to the Settings tab.
Toggle the Data Sync slider and Allow Mailchimp to create Leads in Salesforce slider on.
Data sync and lead creation are now active.
View Data Sync Status
Check the status of data sync through the Monitor section in Salesforce.
Next Steps
Once connected, you can view Mailchimp campaign activity in Salesforce and utilize the Query Builder to manage leads and contacts in Mailchimp. Customize the application as needed and grant access to other users in your Salesforce account.

