Streamlining Collaboration with Wrike and Salesforce Integration
If your team uses Wrike and your sales team operates in Salesforce, seamless collaboration is now within reach without the hassle of switching between platforms or relying on excessive email communication. Visualize Your Task List With Salesforce and Wrike.
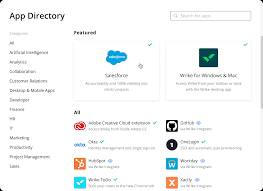
Account administrators can integrate Wrike with Salesforce, a widely used CRM solution. This integration allows you to manage client projects directly within Salesforce, enhancing collaboration between sales and other customer-facing teams using Wrike. This setup facilitates faster, more transparent work processes. More information on Salesforce can be found here.
How the Integration Works
Once the integration is in place, you can monitor task status from within Salesforce. You can link any Salesforce object to a Wrike project or folder, ensuring that changes in Wrike are immediately reflected in Salesforce. This integration supports both Salesforce Classic and Salesforce Lightning.
Key Benefits of Wrike-Salesforce Integration:
- Streamlined Workflow: Salesforce users can remain in Salesforce, while still effectively managing tasks and projects in Wrike, avoiding the need to toggle between systems.
- Enhanced Transparency: Both platforms offer visibility into task statuses, reducing the need to chase down colleagues for updates.
- Automation and Efficiency: Automate the creation of projects and tasks in Wrike from Salesforce records using templates or Wrike Integrate.
Utilizing the Integration
Every record page in Salesforce (where the integration is enabled) includes a Wrike widget. This widget lets you select or change the project or folder displayed, access tasks, and monitor their status. If a project or folder hasn’t been set up for a Salesforce record, you can create it directly from the widget using templates provided by the admin.
The integration’s customization options allow you to select which Salesforce objects (such as Leads, Opportunities, Accounts, or Subscriptions) you want to link with Wrike. On enabled objects, record pages will feature the Wrike widget for easy access to related tasks.
Setting Up the Wrike Widget
To set up the Wrike widget on your Salesforce pages:
- Salesforce Classic:
- Click the Setup button.
- Open the desired page layout.
- Select the Visualforce Pages tab in the settings panel.
- Drag the Wrike widget into the page layout.
- Click Save.
- Salesforce Lightning Experience:
- Click the gear icon.
- Select Setup.
- Open Object Manager.
- Choose the Salesforce item.
- Open the page layout.
- Select the Visualforce Pages tab.
- Drag the Wrike widget into the page layout.
- Click Save.
Practical Applications
Common Use Cases:
- Implementation Teams: Link post-sale projects, client engagements, or fulfillment work to client records in Salesforce for quick access by account teams.
- Marketing Teams: Sales reps can submit requests via Wrike tasks directly from Salesforce, facilitating seamless communication and file sharing.
- IT Help Desk: Manage tasks related to Salesforce Cases in Wrike while keeping Salesforce as the primary record system.
Getting Started – Visualize Your Task List With Salesforce and Wrike
Wrike’s Salesforce Integration is available to Wrike Enterprise accounts. If you are ready to implement this integration, contact Wrike’s Support team for the installation package. Please note that List view is not available for accounts created on or after June 9, 2023; we recommend using the Table view instead.
This integration not only simplifies workflow management but also enhances collaboration and accountability across your teams, making it an invaluable tool for organizations using both Salesforce and Wrike.


