Standard Email Notifications
By default, email notifications for Lead, Contact, Account, Case, and Opportunity are automatically enabled for each new Assignee, with no additional setup required. If you have disabled these notifications and want to re-enable them, or if you wish to set up other types of notifications, follow the steps outlined below.
Notifications Setup Overview
Notifications are configured per Assignee and per MatchGroup. If an Assignee belongs to multiple MatchGroups, they may have different notification settings for each group. Notifications must be enabled for each MatchGroup where the Assignee is assigned.
Start by setting up the notification messages for the desired notification type, then enable the notifications in Super Round Robin (SRR).
Prerequisites
- Mobile in-app notifications require the “Enable in-app notifications” setting.
- Mobile push notifications depend on device-level and app-level settings.
- Salesforce mobile app push notifications require the “Enable push notifications” setting.
- SMS notifications require an Email-to-SMS provider. You can set this up via “Send SMS Message on Lead Assignment” (or other objects) or use your own provider.
Setting Up Notification Messages
For Mobile and Desktop
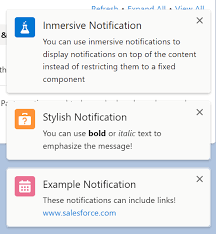
To configure Mobile or Desktop in-app and push notifications, you first need to create a Custom Notification. Mobile and Desktop notifications can be enabled independently, so it’s recommended to create separate notifications for each.
- Go to Salesforce Setup > Custom Notifications.
- Click New in the top-right corner.
- Enter a name and a unique API name for the custom notification.
- Note the API name for later use.
- Select a Supported Channel: Desktop or Mobile.
- Click Save.
- In Salesforce Setup, navigate to Custom Metadata Types.
- Find “SRR Optional Parameter” and click Manage Records.
- Edit the API Name for Desktop / Mobile Notifications based on your chosen channel.
- Enter the API name you created earlier and click Save.
For Mobile only:
- In Salesforce Setup, go to Notification Delivery Settings.
- Scroll to Custom Notification Types.
- Edit the Mobile notification type and select the mobile delivery options.
Read more about Mobile Notifications in Salesforce
For Email
Super Round Robin includes pre-configured email templates for Lead, Contact, Account, Case, and Opportunity notifications, which require no further setup.
For other objects, you need to add a new email template with the prefix SRR_Notification_ and store it in the SuperRoundRobin folder. Learn more in Customizing the Email Alerts > Adding Notification Templates for Other Objects.
You can also:
- Redesign the default email templates. See Customizing the Email Alerts > Editing Notification Templates.
- Send different emails for certain MatchGroups. See Customizing the Email Alerts > Overriding the Default Template by MatchGroup.
After making changes to the SRR email templates, purge the Platform Cache in the “Setup And Status” tab. All SRR email templates should be stored in the SuperRoundRobin folder.
For SMS
To send SMS notifications, ensure you have an Email-to-SMS provider. No further configuration for notification messages is needed.
Enabling Notifications in SRR
Notification settings are configured in the Assignee’s profile. You can set these while creating a new Assignee or editing an existing one. Access existing Assignees via their MatchGroup or from the Assignee Summary tab.
Steps:
- Open the Assignee record.
- Scroll to Notification Settings.
- Select the notification type(s): Mobile, Desktop, Email, or SMS.
- For Email notifications, enter a CC Email Address for troubleshooting if necessary.
- For SMS, configure the Email-to-SMS provider in the Email to SMS Wizard.
Troubleshooting
- The MatchLogs in each MatchGroup record the sent notifications. If notifications are not being sent, check the logs first.
- If email notifications are logged but not received, they may be in the user’s spam folder. Use the CC Email Address field for testing.
- After editing SRR email templates, purge the Platform Cache on the “Setup And Status” tab.
- Ensure all SRR email templates are in the SuperRoundRobin folder, with the correct prefix.
- Verify that notifications are enabled for the Assignee in all relevant MatchGroups.
- Check that the API name for custom notifications is entered correctly if Mobile or Desktop notifications are not being sent.
- Salesforce ORGs have a limit of 10,000 custom notifications per hour. Exceeding this limit will result in lost notifications, including those from SRR.

