Enhanced letterheads in Salesforce can be used to create more consistent and informative email templates, documents, and reports. They can help to standardize information, include branding elements, and make correspondence more professional and recognizable. Create Enhanced Letterhead in Salesforce.
Create Enhanced Letterhead in Salesforce
Enhanced Letterheads in Lightning Experience
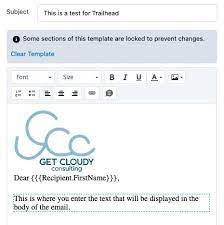
A letterhead standardizes the information in the header and footer of an email template. Often, a letterhead shows a company’s logo and contact information. Enhanced letterheads can include rich text, merge fields, images, links, and other styling. To be associated with an enhanced letterhead, the Lightning email template must use the Handlebars Merge Language.
Use Enhanced Letterheads to Increase the Effectiveness of Lightning Email Templates
Standardize the information in the header and footer of an email template with enhanced letterheads. Include your company’s logo and contact information, or add legal disclaimers and subscription links. Create your enhanced letterhead in a rich text editor, or paste in your own custom HTML for full control of styling. Add merge fields, images, and links.
Where: This change applies to Lightning Experience in Essentials, Professional, Enterprise, Performance, Unlimited, and Developer editions.
Who: To create and edit enhanced letterheads, you need the Modify All Data permission or administrator rights. Anyone can use enhanced templates.
How: To add content, style, and images to your letterhead, open the App Launcher, and select Enhanced Letterheads.
Enhanced letterheads can include:
- Company logo and contact information
- Legal disclaimers and subscription links
- Merge fields, images, and links
- Rich text
- Other styling
To create an enhanced letterhead, you can:
- Open the App Launcher
- Select Enhanced Letterheads
- Use a rich text editor or paste in custom HTML
You can also make changes to your letterhead in one place, and all your email templates will be automatically updated. For example, to add a logo to the footer, you can:
- Click the Add image icon
- Select Browse or Upload
- Select the image from your computer, and click Insert
Enhanced letterheads are available in the following editions of Salesforce:
Essentials, Professional, Enterprise, Performance, Unlimited, and Developer.
Create Classic Letterheads for Email Templates
Create Classic letterheads as the basis for a consistent look for your HTML email templates. Make letterheads available organization-wide so other users can use them in their email templates.
A letterhead consists of properties and details. The properties are only visible inside your organization; they help users identify a letterhead. The details are applied to an email when using that letterhead. Use the letterhead wizard to create both the properties and details of your letterhead.
- From Setup, enter Classic Letterheads in the Quick Find box, then select Classic Letterheads.
- Click Next if an introductory page appears.
- Click New Letterhead.
- To view a letterhead, select the name from the list.
- To edit a letterhead, click the name from the list and choose one of the edit options: Edit Properties or Edit Letterhead.
- To delete a letterhead, click Del next to the name. You cannot delete a letterhead that is used in any HTML email templates.
Set Letterhead Properties
- Check Available For Use if you want users to be able to use the new letterhead immediately.
- Enter a Letterhead Label. The label is used to refer to the letterhead on user interface pages.
- If necessary, change the Letterhead Unique Name. This name is used to refer to the component when using the Lightning Platform API. In managed packages, this unique name prevents naming conflicts on package installations. A developer can change certain components’ names in a managed package and the changes are reflected in a subscriber’s organization. This name can contain only underscores and alphanumeric characters, and must be unique in your org. It must begin with a letter, not include spaces, not end with an underscore, and not contain two consecutive underscores.
- Enter a description for this letterhead. The name and description fields are for internal use only, to describe the letterhead to other users.
- Click Save. The letterhead detail page appears.
Set Letterhead Details
- Set the attributes for the letterhead.
- Click Edit Background Color, and enter a color for the background of your letterhead. Click the color picker button to choose a color.
- Click Edit Header Properties, and select the color, alignment, and height for the top section of the letterhead.
- Click Select Logo to include an image of your company logo in the top or bottom section of the letterhead.
- NOTE Upload the logo image to the Documents tab before you add it to the letterhead. Mark the document as an Externally Available Image so it is visible to non-Salesforce users when it is received in an email. For more information, see “Upload and Replace Items on the Documents Tab” in Salesforce Help.To select an image, choose a folder, and click the document name to attach the document. Alternatively, click Search in Documents, and enter the file name to search for documents by name.
- Click Remove Logo to delete the image from the letterhead.
- Click Edit Top Line, and enter a color and height for a horizontal line below the header. Click the color picker button to choose a color.
- Click Edit Body Colors, and enter the background color for the main body of your letterhead.
- Click Edit Middle Line, and enter a color and height for the middle border in your letterhead. Click the color picker button to choose a color.
- Click Edit Footer Properties, and select a color, alignment, and height for the bottom section of the letterhead.
- Click Edit Bottom Line, and select a color and height of a bottom horizontal line. Click the color picker button to choose a color.
- Optionally, click Preview to display the letterhead in a separate browser window.
- Click Save.
To create an HTML email template that contains the settings in your letterhead, see Create HTML Classic Letterhead Email Templates in Salesforce Classic.
NOTE HTML Classic Letterhead email templates can’t be created in Lightning Experience. However, existing Classic Letterhead email templates can be used in Lightning Experience.
Create Custom HTML Email Templates in Salesforce Classic
You can create custom HTML email templates without using Classic Letterhead. If you don’t know HTML, you can paste HTML code into your template.
HTML email templates can be used, but not created, in Lightning Experience.
- Do one of the following:
- If you have permission to edit public templates, from Setup, enter Email Templates in the Quick Find box, then select Classic Email Templates.
- If you don’t have permission to edit public templates, go to your personal settings. Enter Templates in the Quick Find box, then select Email Templates or My Templates—whichever one appears.
- Click New Template.
- Choose Custom (without using Classic Letterhead) and click Next.
- Choose a folder in which to store the template.
- To make the template available for use, select the Available For Use checkbox.
- Enter a name in Email Template Name.
- If necessary, change the Template Unique Name. This unique name refers to the component when you use the Lightning Platform API. In managed packages, this unique name prevents naming conflicts in package installations. This name can contain only underscores and alphanumeric characters, and must be unique in your org. It must begin with a letter, not include spaces, not end with an underscore, and not contain two consecutive underscores. With the Template Unique Name field, you can change certain components’ names in a managed package and the changes are reflected in a subscriber’s organization.
- If desired, choose a different character set from the Encoding dropdown list.
- Enter a Description for the template. Both the template name and the description are for your internal use only. The description is used as the title of any email activities you log when sending mass email.
- Enter a Subject for the message.
- Click Next.
- Enter the HTML source text for the message. Include all the HTML tags. NOTE If you are including an image, we recommend uploading it to the Documents tab. Then you can reference the copy of the image on our server. For example:
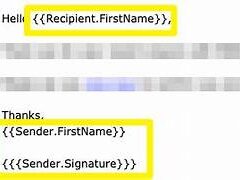
<img src="https://yourInstance.salesforce.com/servlet/servlet.ImageServer? id=015D0000000Dpwc&oid=00DD0000000FHaG&lastMod=1270576568000"/> - If desired, enter merge fields in the template subject and body. When you send an email, these fields are replaced with information from your lead, contact, account, opportunity, case, or solution.
- Click Next.
- If desired, enter the text-only version of your email or click Copy text from HTML version to automatically paste the text from your HTML version without the HTML tags. The text-only version is available to recipients who can’t view HTML emails. WARNING We recommend that you leave the text-only version blank. If you leave it blank, Salesforce automatically creates the text-only content based on the current HTML version. If you enter content manually, subsequent edits to the HTML version aren’t reflected in the text-only version. When left blank, the text-only content is automatically created when sending an email via the UI. If you use that same template to send email via the API or APEX, you must provide the text-only content. Remember to update text-only content when you change the HTML content.
- Click Save.
TIP View a sample of the template populated with data from records you choose and send a test email by clicking Send Test and Verify Merge Fields.
NOTE You can’t modify the content of a custom HTML template when you use it in an email.
Create Visualforce Email Templates in Salesforce Classic
Use the Visualforce programming language to create targeted and personalized email content.
- Do one of the following:
- If you have permission to edit public templates, from Setup, enter Email Templates in the Quick Find box, then select Classic Email Templates.
- If you don’t have permission to edit public templates, go to your personal settings. Enter Templates in the Quick Find box, then select Email Templates or My Templates—whichever one appears.
- Click New Template.
- Choose Visualforce and click Next.You can’t send a mass email using a Visualforce email template.
- Choose a folder in which to store the template.
- To make the template available for use, select the Available For Use checkbox.
- Enter a name in Email Template Name.
- If necessary, change the Template Unique Name. This unique name refers to the component when you use the Lightning Platform API. In managed packages, this unique name prevents naming conflicts in package installations. This name can contain only underscores and alphanumeric characters, and must be unique in your org. It must begin with a letter, not include spaces, not end with an underscore, and not contain two consecutive underscores. With the Template Unique Name field, you can change certain components’ names in a managed package and the changes are reflected in a subscriber’s organization.
- If desired, choose a different character set from the Encoding dropdown list.
- Enter a description for the template. Both template name and description are for your internal use only.
- Enter a subject line for your template in Email Subject.
- In the Recipient Type dropdown list, select the type of recipient to receive email created from the template.
- If desired, in the Related To Type dropdown list, select the object from which the template retrieves merge field data.
- Click Save.
- On the View and Edit Email Templates in Salesforce Classic page, click Edit Template.
- Enter markup text for your Visualforce email template. NOTE If you are including an image, we recommend uploading it to the Documents tab to reference the copy of the image on our server. For example:
<apex:image id="Logo" value="https://yourInstance.salesforce.com/servlet/servlet.ImageServer? id=015D0000000Dpwc&oid=00DD0000000FHaG&lastMod=127057656800" /> - To specify the version of Visualforce and the API used with this email template, click Version Settings. If you’ve installed managed packages from AppExchange , you can also specify which version of each managed package to use with this email template. Generally, use the default value for all versions, to associate the email template with the most recent version of Visualforce, the API, and each managed package. To maintain specific behavior, you can specify an older version of Visualforce and the API. To access components or functionality that differ from the most recent package version, you can specify an older version of a managed package.
- To view the details of the template, click Save. To continue editing your template, click Quick Save. Your Visualforce markup must be valid before you can save your template. NOTE The maximum size of a Visualforce email template is 1 MB.You can’t send a mass email using a Visualforce email template. The {!Receiving_User.field_name} and {!Sending_User.field_name} merge fields work only for mass email and list email and are unavailable in Visualforce email templates.
- View a sample of the template populated with data from records you choose and send a test email by clicking Send Test and Verify Merge Fields. If the email template includes encrypted data, remember that the data is displayed as encrypted within the generated email and in the Visualforce template page. For security reasons, it isn’t displayed in plain text.
- To translate Visualforce email templates based on recipients’ or related objects’ languages, use the
<messaging:emailTemplate>tag’slanguageattribute (valid values: Salesforce supported language keys, for example, “en-US”). The language attribute accepts merge fields from the email template’srecipientTypeandrelatedToTypeattributes. You create custom language fields for use in the merge fields. NOTE The Translation Workbench is required to translate email templates.
NOTE You can’t send a mass email using a Visualforce email template.
Create Enhanced Letterhead in Salesforce

