Leveraging Website Activity Data in Salesforce Marketing Cloud
Understanding how users interact with your website is essential for delivering personalized customer experiences. Salesforce Marketing Cloud (SFMC) offers robust tools to capture website activity and transform this data into actionable insights, enhancing your marketing strategies. This guide walks you through the process of collecting website activity data in SFMC.
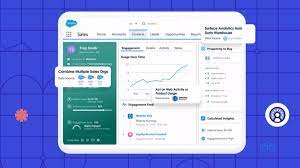
Marketing Cloud Website Activity Collection
Before diving into the setup process, it’s important to understand the benefits of collecting website activity data:
- Gain Insight into Customer Behavior: Track actions such as page views, clicks, and form submissions to uncover what interests your visitors.
- Enhance Personalization: Use this data to tailor content, offers, and communications that resonate with each visitor.
- Boost Conversion Rates: By analyzing the customer journey, you can optimize it to increase the chances of conversion.
Now, let’s explore how to set up website activity tracking in Salesforce Marketing Cloud.
Set Up Marketing Cloud Website Activity Collection
Step 1: Install Salesforce Marketing Cloud Tracking Code
To begin collecting website activity, install the Salesforce Marketing Cloud tracking code on your website. Known as the “Web Collect” code, this script captures visitor behavior data and sends it to SFMC.
- Access Web Studio in SFMC:
- Log in to Salesforce Marketing Cloud.
- Navigate to Web Studio and select CloudPages.
- Create a CloudPage Collection:
- Create a new collection and add a landing page for the tracking script.
- This page will generate the tracking code you need.
- Generate the Tracking Code:
- In the CloudPages section, click on Web Collect.
- Select the “Collect Tracking Code” option to generate your personalized script.
- Install the Tracking Code:
- Copy the generated script and add it to every page of your website where you want to collect activity data.
- Place the script just before the closing
</body>tag on each page for optimal performance.
Step 2: Configure Data Extensions
After installing the tracking code, set up data extensions in SFMC to store the website activity data you collect.
- Go to Email Studio:
- In the SFMC dashboard, click on Email Studio and then select Subscribers.
- Create a Data Extension:
- Click on Data Extensions and select “Create.”
- Choose a standard data extension and configure its fields based on the data types you want to capture (e.g., page views, clicks, form submissions).
- Map Data Fields:
- Ensure the data fields in your data extension correspond with the data points collected by the tracking code (e.g., Email Address, Page URL, Time Spent).
Step 3: Set Up Behavioral Triggers
To maximize the value of your data, set up behavioral triggers in SFMC. These triggers can automatically send personalized communications based on specific website actions.
- Create an Automation:
- Go to Automation Studio in SFMC.
- Create a new automation that starts with a data extract or import activity.
- Define Behavioral Triggers:
- Use Journey Builder to create triggers based on specific website activities (e.g., abandoned cart, browsing specific categories).
- For example, you can set up a trigger to send an email when a visitor views a product page without making a purchase.
- Design the Customer Journey:
- Use the collected website data to build customer journeys that send targeted emails, SMS messages, or push notifications.
Step 4: Leverage Advertising Studio for Retargeting
To further enhance your marketing efforts, use Advertising Studio to create retargeting campaigns based on website activity data.
- Access Advertising Studio:
- Navigate to Advertising Studio from the SFMC dashboard.
- Create a Targeted Audience:
- Use the website activity data stored in your data extensions to build targeted audiences for retargeting campaigns.
- Run Retargeting Campaigns:
- Set up and launch retargeting campaigns across platforms like Google Ads and Facebook Ads to reach visitors who have shown interest in your products or services.
Step 5: Monitor and Optimize
After setting up website activity tracking, regularly monitor the performance of your campaigns and the quality of your collected data.
- Analyze Data with Analytics Builder:
- Go to Analytics Builder to review key performance metrics like conversion rates, click-through rates, and bounce rates.
- Optimize Campaigns:
- Use your findings to continuously refine your campaigns and data collection processes for better performance.
Final Thoughts
Collecting website activity data in Salesforce Marketing Cloud enables you to understand customer behavior better and deliver more personalized experiences. By following these steps—installing the tracking code, configuring data extensions, setting up behavioral triggers, and leveraging retargeting—you can effectively harness website activity data to elevate your marketing efforts.
Start implementing these strategies today to unlock the full potential of Salesforce Marketing Cloud and drive deeper engagement and conversions.
🔔🔔 Follow us on LinkedIn 🔔🔔
Who is Salesforce? Here is their story in their own words. From our inception, we've proudly embraced the identity of Read more

Salesforce Marketing Cloud Transactional Emails are immediate, automated, non-promotional messages crucial to business operations and customer satisfaction, such as order Read more

Salesforce has unveiled a comprehensive analytics solution tailored for wealth managers, home office professionals, and retail bankers, merging its Financial Read more
AI plays a crucial role in propensity score estimation as it can discern underlying patterns between treatments and confounding variables Read more